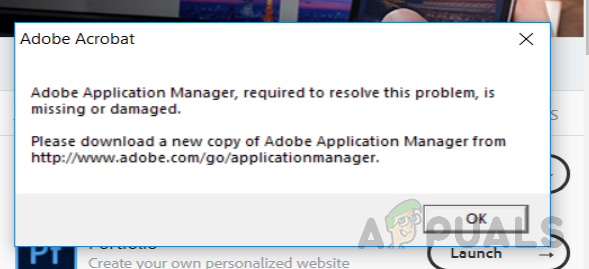
Adobe Application Manager helps in managing all the Adobe applications installed on the system. If the Adobe Application Manager is missing or damaged then you need to immediately take action to fix it. When the user opens the application they might get an error similar to “Adobe Application Manager, required to verify your license, is missing or damaged. Please download a new copy of Adobe Application Manager”.
This can be very frustrating and can waste a considerable amount for the users who rely on Adobe applications for their professional content. The cause of the error can be as simple as missing core files required to run the application, corruption of files to failure of establishing a connection to Adobe Serves. Please see the below methods to solve this problem.
In this method, we will recreate all the files required to launch the Adobe Application Manager by downloading and installing a fresh copy of the AAM since the current error indicates that some files have been damaged or have gone missing from the computer. Please see the steps below.
C:/Program Files(X86)/Common Files/Adobe/OOBE
Library/Application Support/Adobe/OOBE and rename to OOBE.old
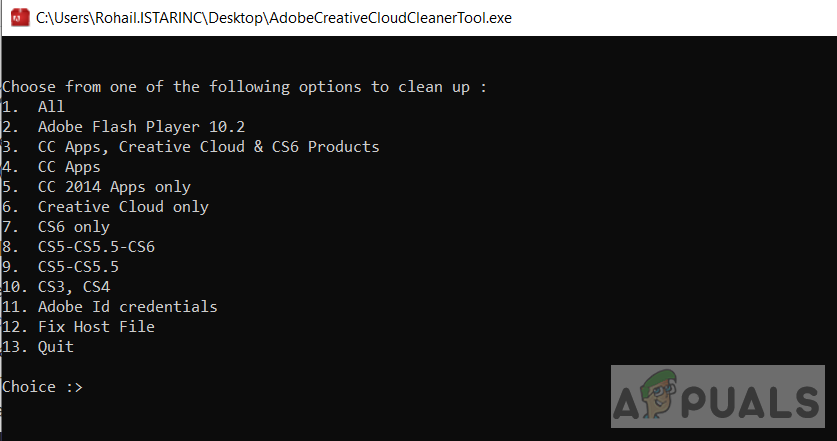
Adobe Creative Cloud Cleaner is an official Adobe utility that helps the user to repair the damaged and missing Adobe Creative Cloud files. It also enables you to remove all the Creative Cloud or Creative Suite Apps installed on your system. Before you can use the Cloud Cleaner, you need to make sure you take care of the following prerequisites:
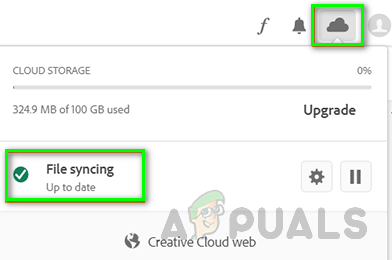
You need to make sure all your native Adobe files are synchronized with the cloud library, otherwise, these files will be lost forever. You need to wait until all the files have been synchronized completely. To do this follow these steps below:
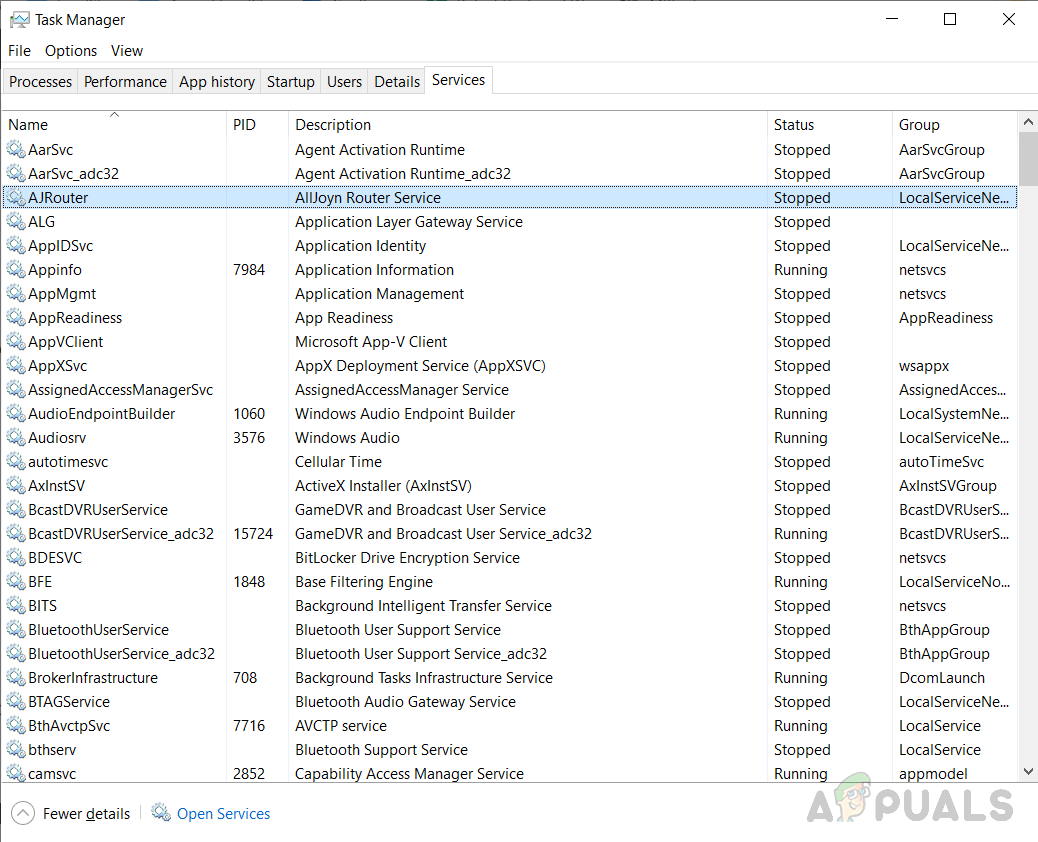
Make sure that the Adobe Desktop Service and Core Sync Service is not running by going to your Task Manager in Windows or Activity Monitor on Mac
Go to the following folders on your PC and save a copy of the files located in these folders.
C:\Users\username\AppData\Roaming\Adobe\CoreSync
~/Library/Application Support/Adobe/CoreSync/
Quit any Adobe applications running in the background including Creative Cloud App and make sure there are no Adobe services running by opening the Task Manager or Activity Monitor. Following is a list of processes that might be running and need to be closed.
Copy and Save all the content present in Adobe Products folders, these may include your third-party plug-ins and preference files (if any).
\Program Files (x86)\Common Files\Adobe\OOBE \Users\\AppData\Local\Adobe\OOBE
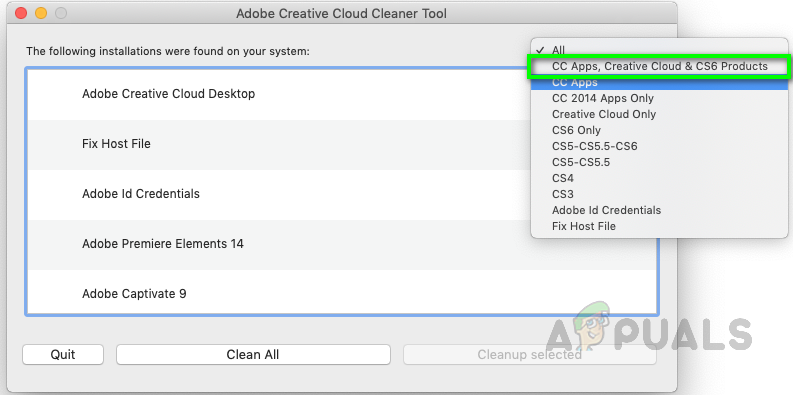 Select the option that says CC Apps, Creative Cloud & CS6 Products
/Library/Application Support/Adobe/OOBE
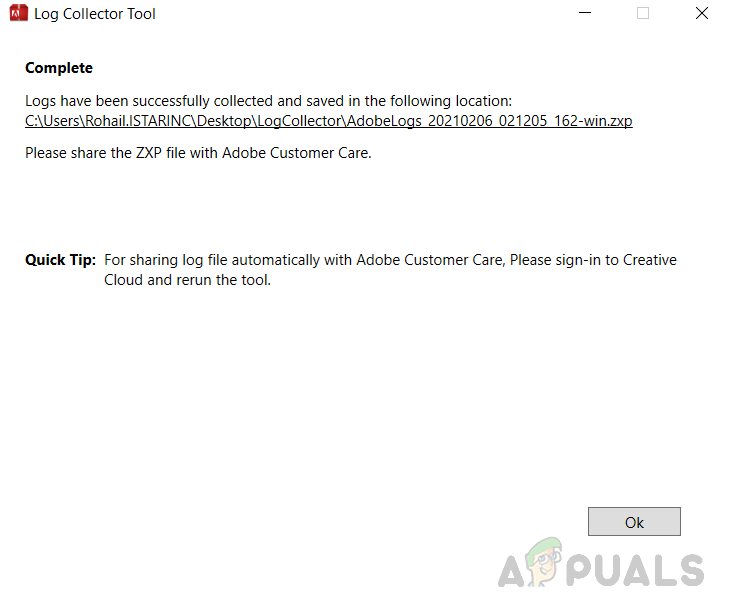
Use Log Collector is a tool used to gather your system logs in the form of a signed ZXP file and sends it to Adobe Customer Care to identify bugs and improve the Adobe Creative Cloud Application. Please see the steps below: